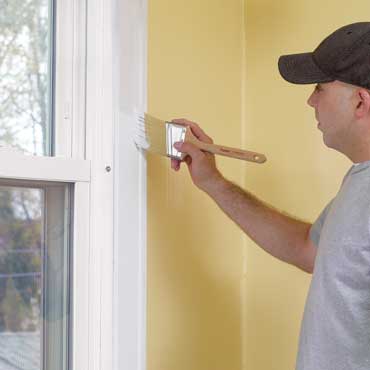
4 Steps for DIY Paint Project Success
 <body>
Painting is one of the easiest and most impactful DIY projects for homeowners
to quickly update their homes. Whether it's a new look in a master bathroom,
adding a pop of color to the guest room, finishing off a basement remodel or
anything in-between, a fresh coat of paint provides a fresh spin that's all your
own.
To make your painting project go smoothly, consider following these important
steps. Take this task list from the experts at Purdy Professional Painting Tools
into account before diving in to your DIY painting project.
Find inspiration. Having a final design in mind before starting your project can
help you plan. From the obvious wall color to more intricate details like
painting trim, doors, the ceiling and more, starting your project with a plan
can help you avoid multiple trips to the store.
Remember, the details are important: incorporating the correct types and sheens
of paint, using complementary colors, buying the proper amount of paint and
more.
Collect the right tools. Part of the planning process includes ensuring you have
the proper tools for the project. A paint brush, roller cover, roller frame,
paint tray and extension pole are the basic essentials for your project's
success. From step ladders and putty knives to wood filler and drop cloths, it's
crucial to have everything you need.
However, keep in mind that not all tools are created equal. For example, when
you use a high-quality paint brush, you're more likely to paint straight lines
when cutting in to corners and walls. You may also notice a much smoother
finish, one without unsightly brush strokes, which means a more visually
appealing result with less effort, too. One option is Purdy Brushes, which are
specially designed and hand-crafted to ensure you get professional-quality
results every time. Find a tool selector to help you find the best brushes,
roller covers and painting accessories for your project at purdy.com.
Prepare the area. Proper planning for your project depends on which room in the
house you're painting. The main rules of thumb include removing everything from
your walls - including curtains, decor and switch plates - using drop cloths to
cover floors; removing or lowering light fixtures from the ceiling; and emptying
the room of tables, lamps, furniture and other movable objects. If this isn't
possible, push all the pieces to the center of the room and cover with drop
cloths.
Don't forget to prepare the surface you are going to paint. Patch and sand any
holes or imperfections. Then wipe down surfaces you plan to paint with warm
water, which helps remove dirt and dust that can sometimes prevent paint from
adhering. If possible, open windows for better ventilation once you're ready to
start.
Clean up. When the painting process is finished and you're appreciating the hard
work, don't forget the job isn't done until you've properly cleaned up. Paint
brushes and roller covers should be washed promptly after use to ensure they can
be used again. Use warm water and mild detergent to clean then let air dry. If
you end up with leftover paint, it can be helpful to save some for future
touch-ups. One helpful tip is to write on the can what room or walls you
painted, the date and color name. This information can be beneficial should you
need to purchase more paint at a later date.


